DIY Cellphone Tripod Mount
So my camera [along with pretty much everything I had] was stolen.
Acquire new mobile, with a good camera. Check
Ready my homemade macro lens. Check
Get prepared for time-lapse and stop-motion mayhem... not quite.
You see, the problem with mobile phones is that even if they have a decent camera, they can't be screwed to a camera tripod. This complicates things for stop-motion or time-lapse situations, among others where one might need a tripod. So what do we do? We make it fit, of course.
All we need are the following materials:
- Cellphone with a camera.
- Regular camera tripod.
- Cassette case [your local librarian might have info on these]
- 3/8 Hex Nut
- Epoxy putty [Mighty Putty, Bondo, PlastiLoka]
- Dremel or Xacto
- Sandpaper [grit 200 is okay]
- Rubber band [optional]
- Patience
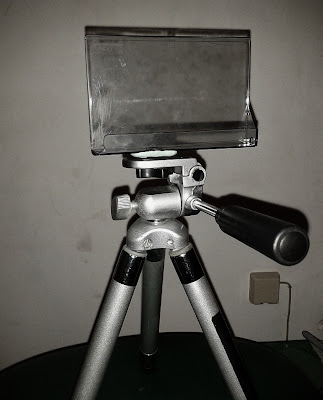
Alrighty then. This is, more or less, what the product of your effort will look like:
 |
| Marvelous. |
By now you must have already guessed how it's done, being a very simple project. However, I'll go on and explain the whole process, since I have nothing else to do at 4am with insomnia.
 So. The first step could have one variant. If your phone fits in the cassette case, you make a hole on the front side, where the camera lens goes.
But I suspect that more often than not, the phone will be longer, and will need to sit through one of the edges -the left one. And we need to cut that off with the Dremel or Xacto knife.
Be very careful not to cut yourself!!
Once the left side is gone, sand off the sharp edges. You don't want to scratch your phone ;]
The next step is quite important. Depending on your phone, the case will be attached to the tripod a little bit more to the left or a little bit more to the right. You need to place the phone in the plastic case, and find its centre of gravity. That's where it will be completely balanced, and where the hole for the hex nut will go.
Once you find out where, mark it with the Xacto, and make that hole. If you're doing it with the Xacto, like me, it's going to take a while, so be patient. Do not cut yourself by rushing it! If you're doing it with the Dremel, don't overdo it.
Don't make the hole too big, so the hex nut fits snugly in it. When you have listened to all the songs in Dude Ranch, you've probably ended up with something like this:
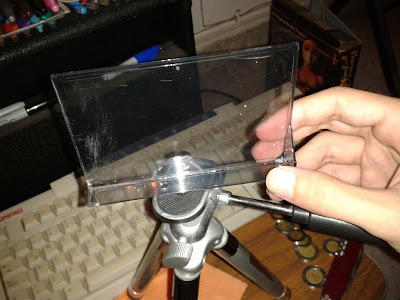
The rest is pretty simple: get the hex nut in its hole. Make it stay completely horizontal, so you don't end up with crooked photos. Once it's in its place, prepare the epoxy putty, and apply. Make it, if possible, fill the tiny gaps between the hex nut and the plastic, and cover up to the nut's level. Remember that the inside of the case should NOT have the hex nut or any epoxy protruding; it must be totally flat because that's where you're going to place your phone.
And then we add a second dose of patience, and let it curate for the next 24 hours.
Et voilà! Screw the case to the tripod, and put the phone in the case. You might want to put a rubber band around the case and the phone, so it doesn't move or falls accidentally.
 |
| Ta-daaa!! |


